
A couple of weeks ago I did a pewter casting project with my 3D class. As always the project was a hit and all the students had a great time. Who doesn't love playing with fire?! Here are some pics from the casting day:

We used ceiling tiles as our molds...just carved into them with
exacto blades and dental tools.

Heating the pewter in a cast iron ladle with an acetylene torch.

Waiting until just the right temperature so the metal will freeze up in the mold and not pour straight through. Pewter has a really low melting temperature and stays molten for a long time so this takes a little practice.

Getting ready to pour the metal.

Pouring!


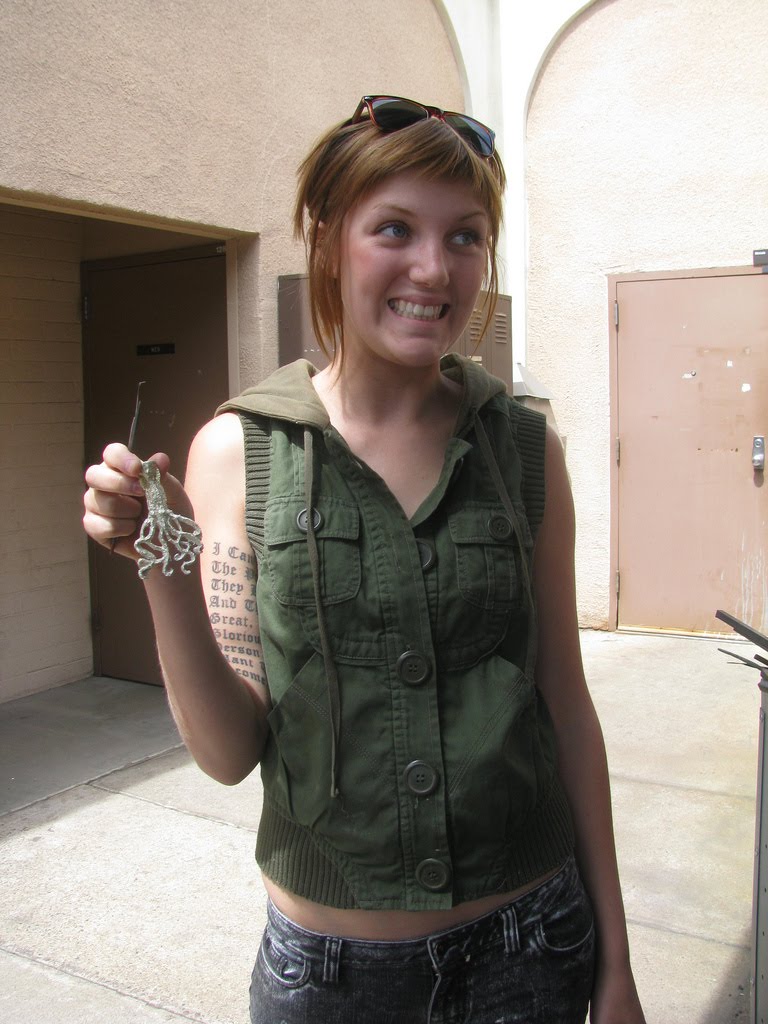
And just a couple of the final products.

 A couple of weeks ago I did a pewter casting project with my 3D class. As always the project was a hit and all the students had a great time. Who doesn't love playing with fire?! Here are some pics from the casting day:
 We used ceiling tiles as our molds...just carved into them with exacto blades and dental tools.
 Heating the pewter in a cast iron ladle with an acetylene torch.
 Waiting until just the right temperature so the metal will freeze up in the mold and not pour straight through. Pewter has a really low melting temperature and stays molten for a long time so this takes a little practice.
 Getting ready to pour the metal.
 Pouring!
 And just a couple of the final products.


1 comments:
Great pieces !!
Post a Comment